Last Updated on December 17, 2025 by Hannah Stephenson

Until recently, I was always too scared to hike the India Venster trail up Table Mountain.
But after completing it, I’ve realised that it’s actually not as scary as people say!
I went up India Venster with a guide, and while I think I would have struggled without his help, it’s actually very manageable as long as you have somebody to show you the way.
Now, after tackling the route for myself, I can officially say that I think it’s THE best way up Table Mountain (as long as you’re not scared of heights).
So if you’re thinking about hiking India Venster and need info, tour recommendations, or just some encouragement that you can actually do it, then you’ve come to the right place. Let’s get into it!
- About India Venster
- What do you see when hiking India Venster?
- Why I booked a guided hiking tour for India Venster
- Which India Venster tour did I book?
- Was it worth doing a guided tour?
- How hard is India Venster REALLY?
- What to bring for the India Venster hike?
- Can you hike back down India Venster?
- Would I book this tour again?
About India Venster
India Venster is simultaneously known as the most beautiful and the most challenging route up Table Mountain. Let’s start with some quick stats:
Time needed: 3.5 hours
Distance: 3.7 kilometres / 2.3 miles (one way)
Elevation gain: 700 meters (approx)
Difficulty: Challenging
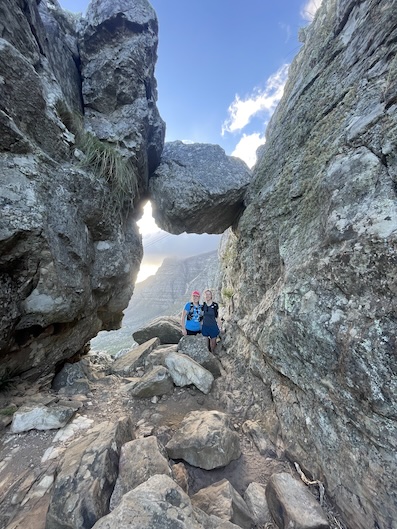
India Venster means “India Window”, which refers to a hole in the rock which is said to be shaped like… well, India. Personally, I think that that’s a bit of a stretch, but it sure is pretty. You reach the window quite soon into the hike.
The route starts and ends near the cable car, so it’s convenient in that sense. It’s not recommended that you hike back down again.
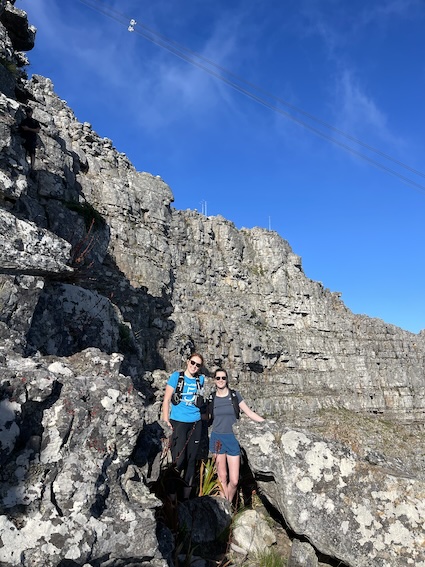
There’s also a small section where chains and ladders have been installed to help hikers on the way up. People often talk about this like it’s some super scary thing, but in reality these features are helpful and nothing to be intimidated by.
It’s also worth noting that “challenging” can mean different things. The hike isn’t insanely physically demanding, it just requires some know-how on where to put your hands and feet while scrambling. You need to be reasonably fit and agile, but nothing crazy.
What do you see when hiking India Venster?

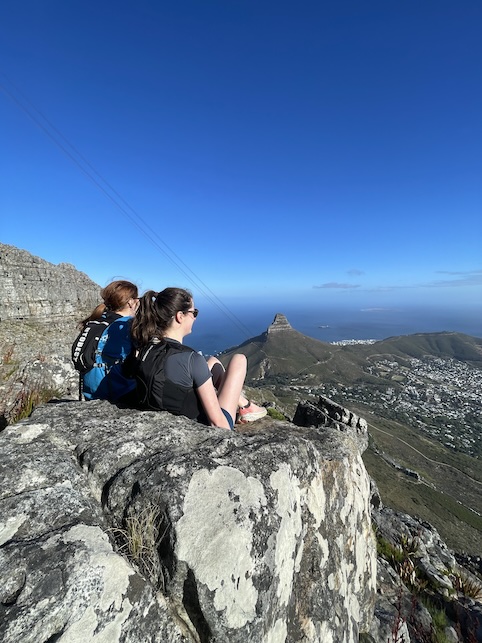
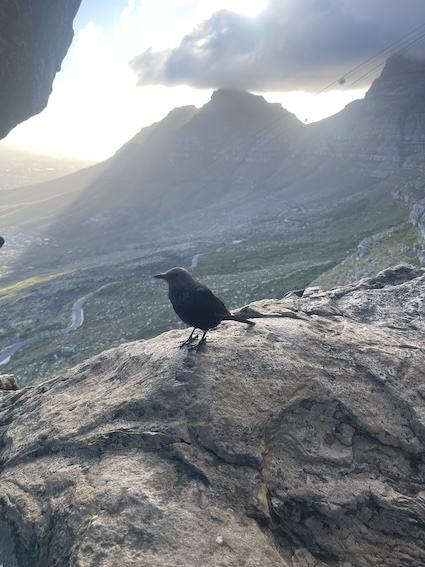
In addition to the aforementioned “India Window”, we saw pretty much the entire city when we hiked up India Venster. At the beginning, we had fantastic views of the city bowl and Table Bay.
Later on, the route winds around the side of the mountain, affording vistas of Camps Bay and the Twelve Apostles. And of course, once you reach the top of the mountain, you’ve got 360° views of the entire city!
Our guide, Patrick, also pointed out a lot of local flora to us. He said that on some days, it’s possible to spot mountain goats, but sadly we weren’t that lucky.
Why I booked a guided hiking tour for India Venster
I am not an experienced hiker and I had never done any scrambling before, so I was hesitant to attempt this route on my own. I’m also hopeless with directions, so having a local guide to show me the way definitely seemed worth it!
I chose this particular tour because it was private, reasonably priced, and had nothing but 5 star reviews (which you can read here!)
Which India Venster tour did I book?

I found this tour on Viator. It starts out pretty early, with meet up at 6:30 am, but the early start is worth it. During Cape Town’s summer months, you definitely want to beat the heat!
We paid R1,550 each for our tour, but you can double-check prices here.
Then, it was another R280 for the cable car ride down the mountain afterwards. That’s standard practice for Table Mountain hiking tours!
Was it worth doing a guided tour?

100%.
For one thing, it’s so much safer to go with a guide.
For another, our guide, Patrick, was amazing! He was super friendly and just a really interesting guy. We loved his company, and he made me realise that I actually LOVE scrambling – who knew?
The hike was very doable with Patrick’s guidance, but I genuinely don’t know if I would have managed without him! I wouldn’t have had the first clue where to put my hands and feet, but with Patrick to show me the way it was actually fairly easy!
Since this is a private tour, my friend Jess and I had Patrick’s undivided attention and we didn’t have to wait for, or try to keep up with, anybody else. The trail is quite narrow in places, so I’m not sure I’d want to do a big, shared tour.
We took the hike at a relaxed pace, with plenty of stops to catch our breath and take in the views. I’m a real plodder, and I didn’t feel under any pressure.
I also really enjoyed Patrick’s commentary. He taught us all about the wildlife that lives on the mountains and kept us entertained with stories about Joshua Penny, the mystery man who lived in a secret cave for 14 months!
He also took lots of photos for us, without us even having to ask. To be honest, I’m usually relieved at the end of a hike, but I genuinely didn’t want this one to end! It was incredible.
You can book your guided India Venster hike HERE!
How hard is India Venster REALLY?


I won’t lie to you, reading blogs and Google reviews of the trail before the hike made me pretty nervous.
Okay, really nervous. I actually had a nightmare about it the night before the tour.
And without Patrick, there are a few scrambling sections that definitely would have stumped me. But with his help, I not only managed to do it all, I also had A BLAST.
Lots of people said you need to have a lot of upper body strength, but I have almost zero and I managed just fine! Patrick did help me up a few times, but honestly with someone to show you where to put your hands and feet, it’s absolutely fine.
For me, the hardest part of the hike was actually the first 15 minutes because it was a fairly steep uphill climb. It wasn’t technically difficult though. Meanwhile, the technically difficult parts of the hike aren’t really that tiring, so it all balances out.
I will say, though, that if you’re afraid of heights then India Venster is probably not for you.
What to bring for the India Venster hike?
- At least one litre of water – I didn’t end up needling all of mine as the wind was cold, but on a warmer day, it would have been a different story.
- Running or hiking shoes – Patrick wore Salomans while Jess and I wore our running trails. Both were just fine!
- Debit/credit card for the cable car ride down – Apple Pay works too!
- Cash – I lost my debit card before the tour so I was unable to draw cash, but I wish I had as I would have liked to have given Patrick a tip.
- A backpack or vest – I wore my running vest for this hike, but a backpack would work just as well
- Hat and sunglasses – even if the wind is cold, you’ll want to protect your face from the sun!
- Sunscreen – same reasoning. I applied mine before the hike and then reapplied about halfway up.
- Snack – I didn’t actually bring a snack but I was pretty hungry by the time we got to the top!
- Light layer – even on a hot day, the wind can mean you get pretty chilly on the hike. It’s hard to believe before you actually get up there, but it’s worth bringing a light layer with you that you can easily remove and pack away.
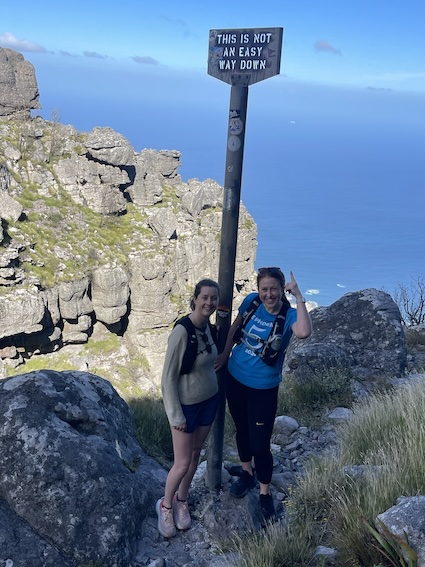
Can you hike back down India Venster?
No, it’s not recommended!
Scrambling down is more difficult than scrambling up, so unless you’re a pro, don’t hike back down this way.
We took the cable car down the mountain. However, if the wind picked up and the cable car had closed, we would have taken the Platteklip Gorge route down instead.
Fortunately, that wasn’t necessary! We were actually super lucky. The cable car had closed that morning, but it reopened just as we arrived at the top of the mountain.
Would I book this tour again?


Yes! I can’t recommend it enough. I was on SUCH a high after finishing this hike. It reminded me of runner’s high after finishing a big race!
The India Venster hike is truly one of the best things I have ever done in Cape Town, and that’s really saying something. I would do this tour again in a heartbeat!
Book your guided India Venster hike HERE, with free cancellation!
I love your blog it is so well written and with plenty of usefull information.
Thank you, Patrick! 🙂